
Hello my creative friends!
Today I am sharing how I paint my own Christmas cards in watercolor.
My daughter and I painted last year’s card during her Thanksgiving break from school. It was fun to put on some Christmas music, have a cup of cocoa, and be together creatively—plus, it got us into the holiday spirit without having to go out on Black Friday!
So, grab your cocoa and a few simple supplies and let’s get going!
You will need:
* sketchbook or notebook paper to try out design ideas; a pencil with eraser
*5×7 inch pieces of watercolor paper, 140 lb (cold press if you want texture, hot press if you want less texture)
OR
*5×7 inch pieces of mixed media paper (I used Strathmore Mixed Media Paper—vellum surface, 184 lb., 400 Best series; it is smooth like hot press paper, less expensive than good watercolor paper, and perfect for this type of fun, sketchy painting where you might not want to use your best paper.)
*watercolors and a palette to mix them on
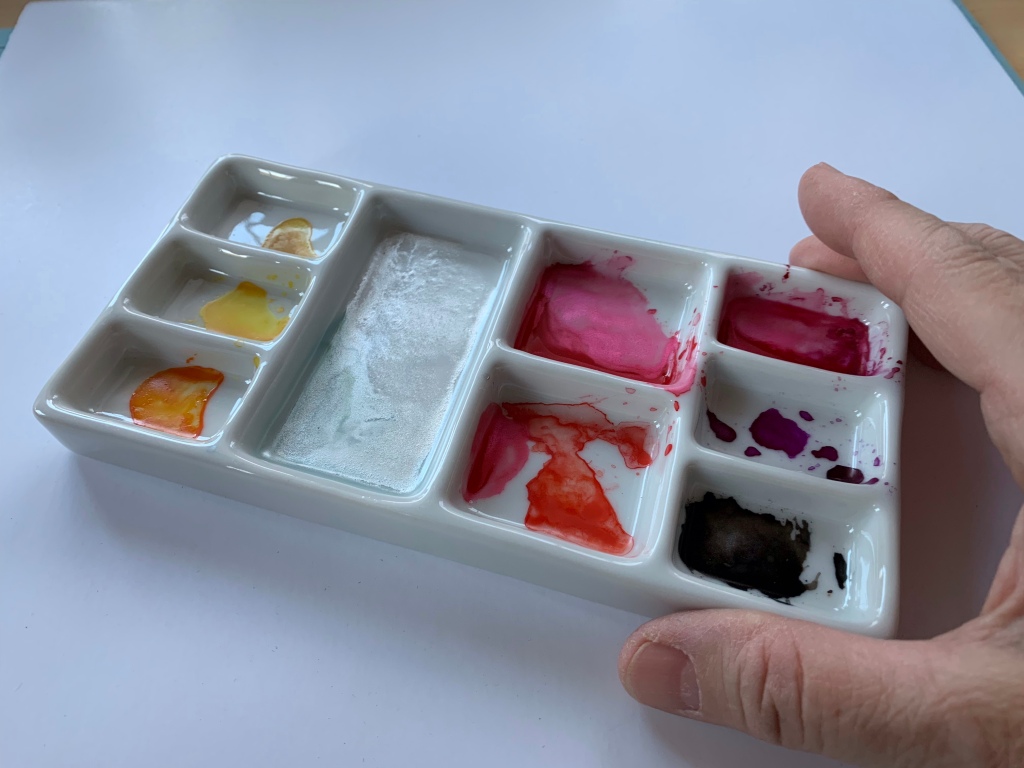
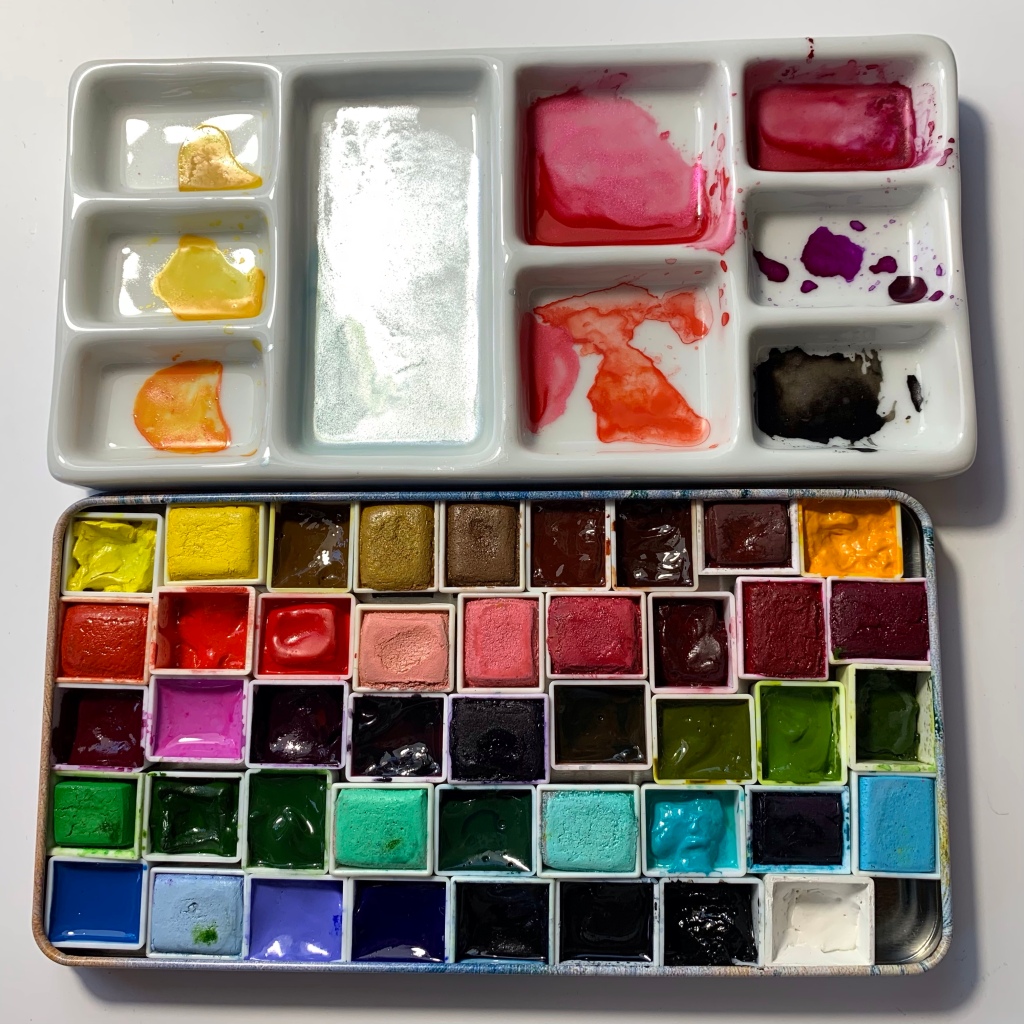
Check out the little porcelain mixing palette and watercolor paint tin I found on Amazon…


*watercolor brushes of your choice (I prefer Silver Black Velvet rounds, size 4, 6, and 8 for most of my watercolor work.)
*and of course, water! One cup for cleaning brushes, and one for dipping into for clean water.
PROCESS
STEP 1: Start by considering what kind of card you want to send. Traditional? Whimsical? Cartoony? Elegant?
Then look at the inspiration around you that fits with the aesthetic you have in mind.
You might find that the ornaments on your tree, the toy soldier on your fireplace mantle, or your favorite Christmas carol sparks an idea for what to paint.
This year, I am all about snow people. In fact, tomorrow my family and I will be creating a snow gnome in our front yard, sans snow as of yet, but I’m sure that will be added soon enough!
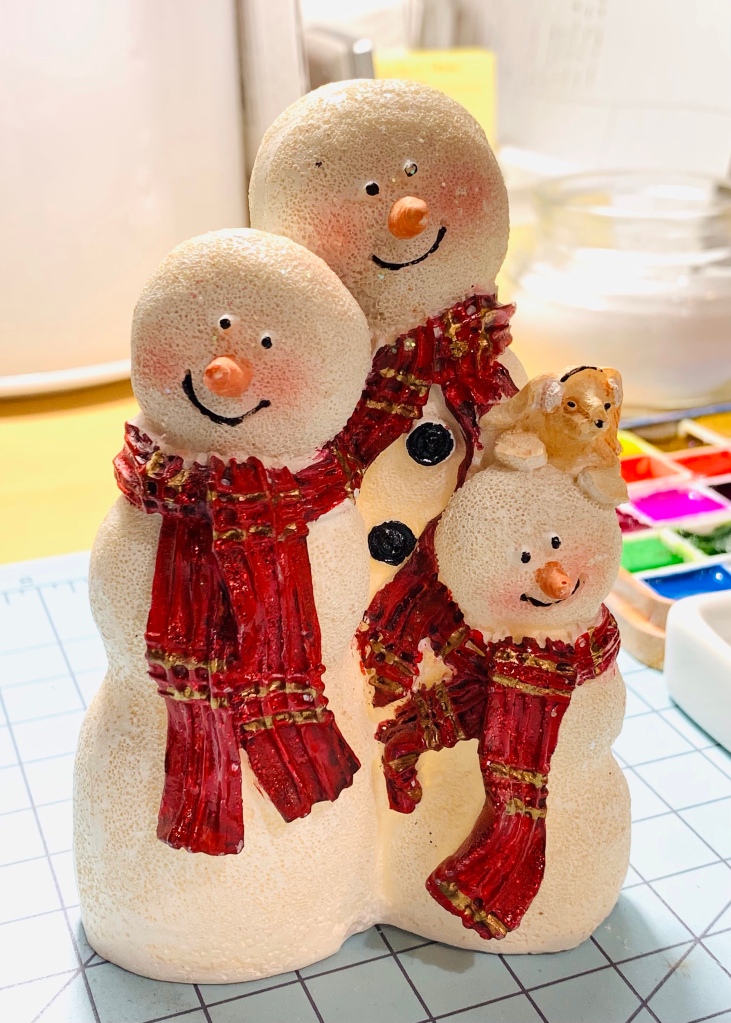
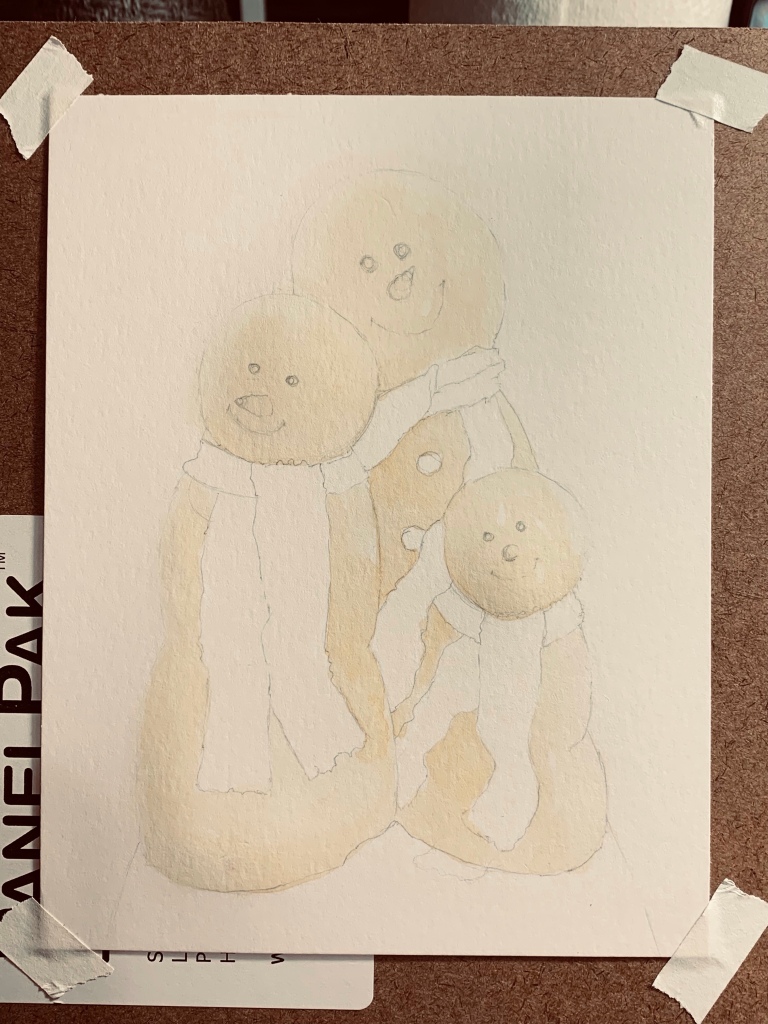
So to that end, I decided to paint this little figurine of a snow family that we love.
STEP 2: On a plain piece of sketch or notebook paper, sketch out your design idea very simply by placing the major shapes within a 5×7 inch rectangle. Don’t worry about the details at this point unless you feel unsure about placing them correctly later with paint.
Once you are happy with your design, you can jump right to sketching onto your painting paper. Just remember to draw lightly onto your painting paper to make it easier to erase later—especially if you don’t want pencil lines in your final product.

STEP 3: Now for the fun! Add your first base washes of color to your painting. Use lots of water for paler washes, less for stronger washes. Since watercolor is usually painting light to dark (that is, you save your white/lightest areas instead of painting over them), start with paler washes. You can always add more color later.
STEP 4: Continue layering each area of color until you get the value, texture, and depth you desire. Be sure to let each layer dry before you glaze more color on top.

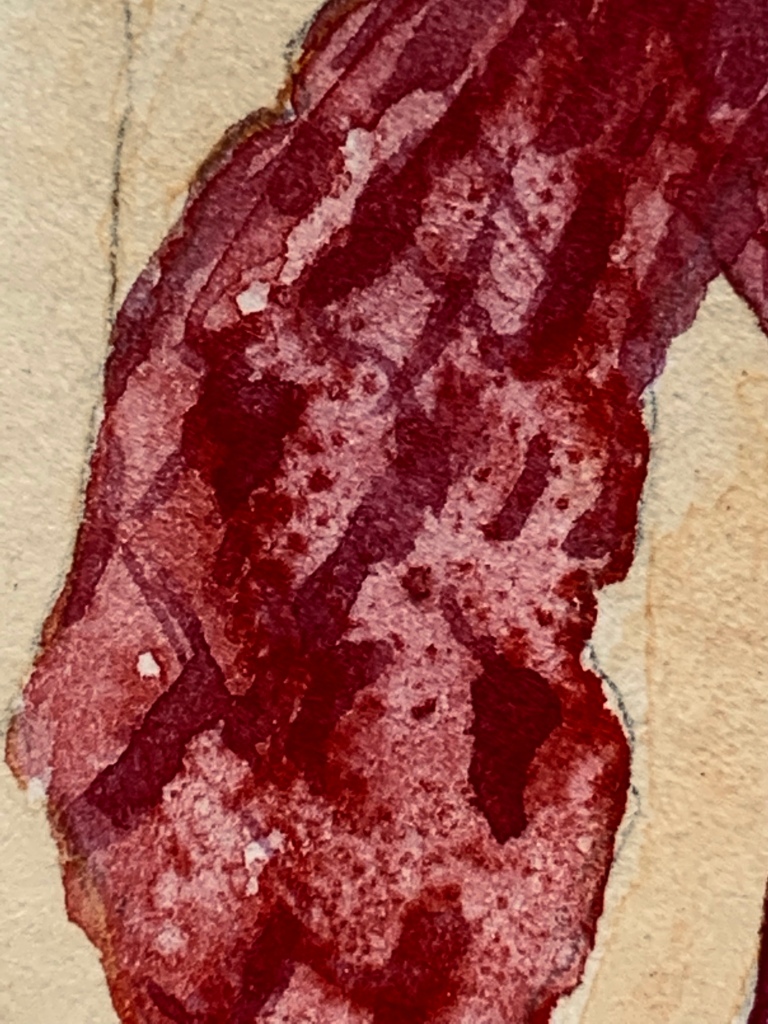
Texture tips: Keep in mind that as you are painting, you may want to add extra texture in certain areas. One of the easiest ways to do this is with salt.
In my painting, I wanted to create texture in the scarves of the snow people, so I sprinkled regular table salt onto the areas while they still were glistening.
You will get different effects depending on how wet the paint is—generally, the wetter the wash when you apply the salt, the more effect the salt will have. Applying salt to an almost dry wash will have, surprise, almost no effect. 🙂
You can also try out different sizes of salt granules—from kosher, to pink Himalayan, to very fine—each will give different results. Or surprise yourself and purchase a salt grinder which will give you various sizes to keep things more random looking!
Whatever salt you end up using, just be sure to let it dry before wiping it off or you will smear the effect it created.
Another way to add texture is by spattering on or dropping in plain old water. This will create blooms by pushing the wet pigment out of the way and revealing some of the paper color underneath. Experiment with different applicators to see what gives you blooms with the size and randomness you desire — flicking the end of an old toothbrush will give you smaller, more numerous blooms; tapping your paintbrush onto your index finger is good for larger blooms; an eyedropper will help achieve boulder size blooms….you get the picture.
The sky is the limit when considering tools to help achieve texture and not what this post is about, but other ideas might include using the edge of an old credit card to scrape back into paint; placing wadded up plastic wrap onto a wet wash and letting it dry; dabbing back into wet paint with a tissue or paper towel to lift out paint; using an artificial sponge to dab paint onto a dried underlayer, etc.

STEP 5: Once you have your painting working as a whole, only then should you refine it with details and your darkest accents. For my snow family, this meant adding facial features, buttons, and the glittery paint for the metallic scarf threads (not really visible in the photo).

STEP 6: Once finished with the positive forms of the snow people, I erased my pencil lines and turned to washing in a simple glittery background using a mix of silver and light blue metallic paint made pale with lots of water.
I cleaned up any messy edges and made sure to use a clean, damp brush to soften any hard edges that appeared once my washes were dry.

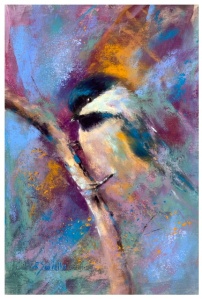
And here is the result of adding my artwork to a card-making template available from Snapfish.com.

I ordered my cards with Snapfish and they will be sent out to family and friends who I hope will enjoy the touch of whimsy in their holiday season!
So go on people! Make merry and get your creative juices flowing.
I hope you enjoyed this little demo and I hope you have a wonderful Christmas season.
Peace and blessings to you all!
~R

I have the same porcelain palette and I love it! Love using the salt effect too. Your snowmen card turned out super cute.
LikeLike
Thanks Allison! I love that little palette. Thanks for the comment, and Merry Christmas!!!🎄
LikeLiked by 1 person